
Supplies: 
- beads
- thin wire (28-32 gauge)
- thicker wire (18-20 gauge)
- pliers
1. Cut your stringing wire triple the length you would like your bracelet (or lengthen it for a necklace). I measured mine to about 18 inches – that left me with plenty on each end to wrap/tie it off and also to adjust for breaks in the wire if necessary.
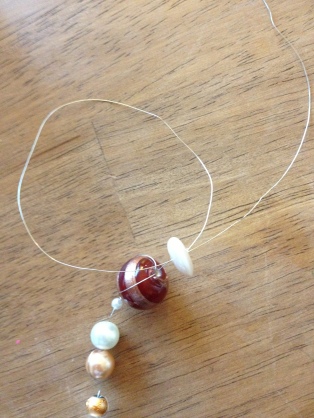
2. Begin stringing your beads on. Move your center bead to the center of the wire, and then take one end and string it back through the bead. Now, the bead is held in place. Work your way out to the end of each strand (or however long you want it), continuing to string the beads on the wire. You may choose to leave some beads mobile between the beads you have held in place to mix it up.

3. Repeat these steps to create at least two more strands.


 4. To create the clasp, wrap your 20 gauge wire around the tip of your round-nose pliers.Straighten out one wire and then wrap the second around the first wire. Snip off the end. With the longer end, shape the wire into two small wings. These will be the clasp bars that fit into the circle on the other end.
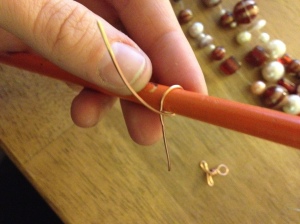
5. To make the hoop for the clasp,wrap your piece of wire around a pencil (or something similar in size). Again, wrap one wire around the other to close the hoop.

6. Twist the ends of the wire together. Wrap them around the clasp and tie. Then, twist your three strands together at strategic points to create the jumbled effect. Be careful you don’t twist too much — sometimes the wire can break if overworked. A simple once-around twist will do the job. Then, twist the remaining end around the clasp.
Congrats! You’ve just created your own bracelet!

Check out my other pieces at Eva M. Designs at Etsy.


